 Daddy took Olive on a little tour to look at all of the Sooner memorabilia.
 (For inquiring minds, you know who you are. :) Yes, we have established the pacifier only in the bed rule, but today was an exception. Stephen had business to take care of this morning that lasted longer than expected which pushed our one chance to get out of the house into her nap time. It kept her content, so we broke the rules. Bad consistency, I know! )
 During nap time, I got the urge to work on a little sewing project I had seen on a blog. A ruffled camera strap! For a great tutorial on how to make one for yourself, go to http://www.kevinandamanda.com/whatsnew/crafts-projects/make-a-ruffled-camera-strap-slipcover.html
and while you are there, look at her scrapbook room. It will either make you totally hate her or desperately want to be her. I can't decide which. Thanks to Deanna for introducing me to this blog where she actually creates fonts out of handwriting. Okay, now I am really leaning towards wanting to be her!
To see how I completely screwed up the tutorial and did it another way, keep reading...
(I hope the sewing Gods don't strike me down)
(I hope the sewing Gods don't strike me down)
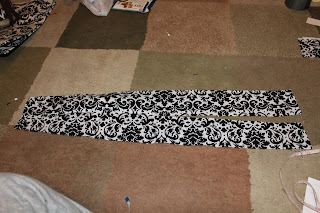
First measure your camera strap, mine was 24" by 1.75", you will need to add 1 inch to these measurements for your fabric measurements. Then cut two pieces of fabric to these dimensions.
 Hem the ends of the fabric pieces individually, then place the fabric pieces right side together and pin down the middle. She said to measure to make it in the center, I just eye balled it (Sorry sewing Gods!) Then sew the two fabric pieces together on one side using a basic stitch.
  She used three different fabrics, but I have a slight obsession with ribbon, so I decided to use ribbon. I thought the silky texture would be fancy! Sew a basting stitch (the long stitch) down the middle of the ribbon, leaving a long piece at the end.
 Now this is where I will show my sewing ignorance. You are supposed to pull the long basting stitch out, which is why you left a long string at the end. And then sew it onto the fabric. But, Nora here, had forgotten to burn the end of the ribbon to keep it from fraying and decided to do that. So I burned the thread that I need to pull. Brilliant, huh? So, I created my own ruffle by carefully pushing the ribbon in.
 It still works, it is probably just a little more time consuming and not as accurate. If you do it my way, you will need to cut the ribbon 2.5 times longer than your fabric piece. (mine was approximately 60 inches of ribbon) Let's be honest, I didn't measure it with a measuring tape, I just doubled it and then of course, didn't have enough ribbon and had to add some in. But, you can't tell! So be smart, unlike me, and measure your ribbon.
  After you have finished your ruffles. Turn the ruffles to the inside and sew the other side of the two fabric pieces together. Then turn it inside out and TADA!!
  Did that even make sense? Probably just go check out Amanda's tutorial. I guarantee it will be more helpful then my rambling. :) Happy Sewing!


No comments:
Post a Comment